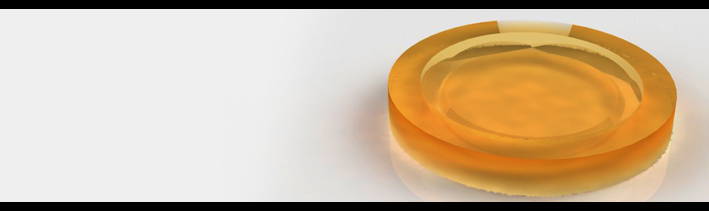
What is Melt & pour “latex”?
Now you can duplicate figurines, by
Mold Making & Casting Materials Rubber, Plastic, sculptures, prototypes, crafts, jewellery and More with our non-toxic
Re-usable Liquid Silicone substitute . That will not stick to metal, clay, ceramics, plaster or wood. Our Re-usable “latex” moulds are durable, Re-usable, and great at picking up fine details in your parts. Ideally used to make secondary moulds for casting plaster, craft, plaster and casting resins.
Being green is not about saving the environment it’s about cutting cost and watching the bottom line, it’s just good business, the beauty about our Melt & pour “latex” is that once you have made castings of items either one or one hundred or more. Just Re-melt the “latex” and apply it to your next new project. So whether you’re a professional designer, artist or a simple hobbyist
Melt & pour “latex” will save money, saves space, reduce your impact on the environment and build your bottom line
Tell your friends to get a free gift
Click here to
TELL A FRIEND about Melt & pour “latex” for model making enthusiast, product designers handcrafting . If you buy more than one unit
(with your friends), you'll get a free gift & discount.
A Casting Job Essentially Involves
Receiving the master and prepping it for the rubber-mould (smoothing the finish if appropriate, sealing any holes etc).
- Once cured, the master is demoulded (removed from the mould).
- When casting in resin, the material is degassed, then poured into the mould, and left to set.
- After a suitable time, the casting is demoulded.
- The finished casting is then treated to produce the agreed final state.
A Word About Masters To Cast From
It is recommended that whomever makes the master, should be advised that it is for mouldmaking.
A master may not survive the process. If this is a problem it must be discussed before production begins.
Ideally, a master will have very little in the way of overhangs & undercuts. The rubber mould can become caught on these, and thus prevent demoulding. But composimold is flexible and elastic enough to accommodate most shapes
Moulds
- For resin, a 1-piece mould, or open mould, is a simple technique suited to objects with a flat or hidden side, like a brooch for example.
- For resin, a 2-piece mould is used to encapsulate an object. This is suitable for more complex objects.
Resin Casting
Typically resin can be pigmented to produce a range of colours. Colour-matching can be done, but is difficult to get exact.
Epoxy resin can be mixed with metal powders to give a certain finish.
Always de-gas the mixture before pouring to minimise air-bubbles.
Jacket Moulds To Save More Money
Produce Jacket moulds using composimold and a hard shell.
This is suitable for larger objects, where a full mould in rubber would be impractical and expensive.
- Made of 2 layers, the first of which is thin and made of rubber and takes on the surface detail of the master.
- The second layer is much thicker, and provides rigidity, keeping the rubber layer in shape.
Not usually suited for 2pt moulds.
How to make your own rubber mould
Although Melt & pour “latex” is harmless to most surfaces, always test an inconspicuous area prior to applying over the entire surface.
- Models with holes or “tunnels” that extend completely through the piece must be closed
- Fill hole’s/& gap around the edge of the base and in your container with modelling clay.
To apply, simply brush or pore the melted Melt & pour “latex” liquid over the surface of the model, then around the base to create a flange. Allow the Melt & pour “latex” to air cool or use a cooler/refrigerator to speed up setting time.
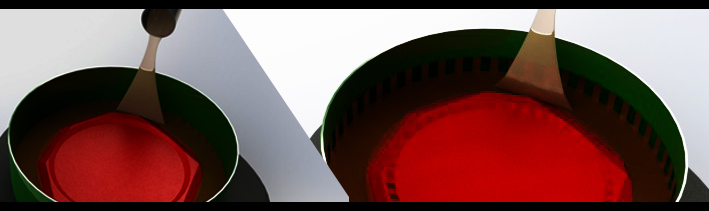
When your mould becomes solid, peel it off the model. Dust the inside of the mould with talc powder to keep the fresh “latex” from sticking to itself. Support the mould and pour in the liquid casting material of your choice.
You can also make flat blanket mould, usually a “plaque-like” piece or wall sculpture is attached to a base, using small dabs of plasticene clay to fill the gap around the edge, giving a good, clean edge to the resulting mould.
Apply enough Melt & pour “latex” to give a thick blanket covering of “latex” and allow to stiffen. Trimmed flush with the base.
Retaining sides are added to contain plaster. These sides can be of any rigid material that will hold the plaster as it sets. With a brush apply a light solution of liquid soap and water over the “latex” blanket mould and allow to dry. This soap solution when dry will act as a mould release agent, allowing the pieces to be separated later. Next pour plaster/resin etc over the Melt & pour “latex” blanket to form a supportive base for the flexible mould. Tip to support mould is to pour sand or kitty litter into a shallow box. Leaving the original piece in your mould, press the mould into the sand or kitty litter to create an impression. Once the impression is made, carefully remove your mould. Pull original from mould, then place mould back into sand or kitty litter.
When the plaster/resin etc has set , it can be removed. The plaster is lifted off, and then the “latex” mould is removed from the model. Replace the “latex” mould into the support mould, and pour in the casting material of your choice.

How long does the delivery take?
Please read the “Delivery” section from the “about us” drop down menu.
Order Product
| Description |
Availability |
|
|
| Melt & pour Moulding Kit (LT)0.28 kg
|
Moulding Kit (In Stock) |
RRP:
£16.99
|
Buy |
| Melt & pour Extra Firm! Moulding Kit (PowerMold) 0.28 kg
|
Moulding Kit (In Stock) |
RRP:
£24.20
|
Buy |
| 2 x Melt & pour Moulding Kit (LT) 0.51 kg
|
Moulding Kit (In Stock) |
RRP:
£31.00
|
Buy |
| 2 x Melt & pour Extra Firm! Moulding Kit (PowerMold) 0.51 kg
|
Moulding Kit (In Stock) |
RRP:
£45.00
|
Buy |

